
Movavi Screen Recorder Review
What is Movavi Screen Recorder?
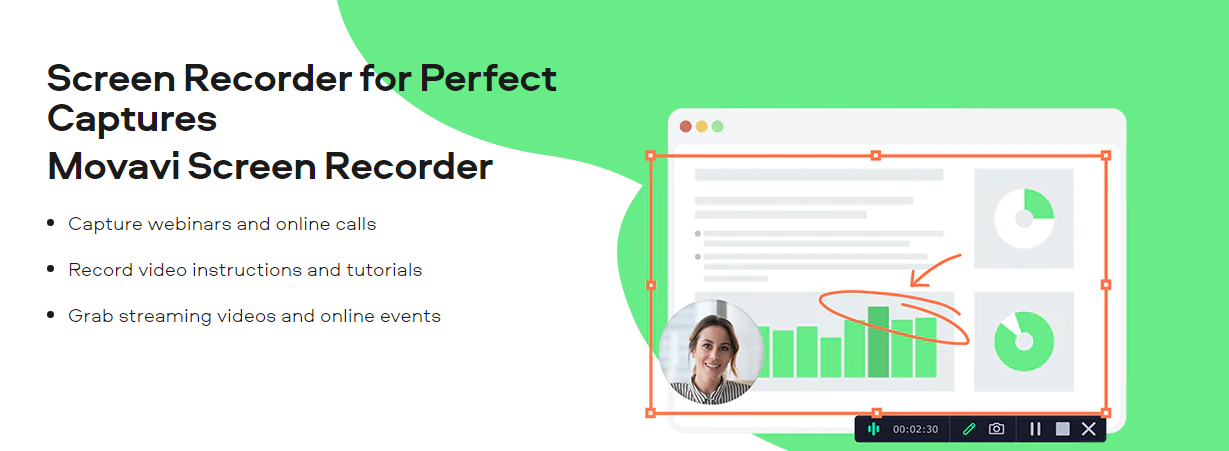
Movavi Screen Recorder is an easy, intuitive, and user-friendly tool that allows Windows and Mac users to capture any activity they wish to record from their computer screen.
The app allows you to record videos of any action on your screen, take and save screenshots, and export your images and videos in an appropriate format such as AVI, MP4, MP3, JPG, GIF, MOV, PNG, BMP, MKV.
Once you are done recording, editing, and saving your content, you can share videos on YouTube and Google Drive and graphics on Telegram and WhatsApp.
The software works with Intel hardware acceleration, which supports a smooth and seamless recording process. It also records videos in MKV format, which ensures top-quality video output.
The program also gives you the ability to set SuperSpeed mode, which effectively boosts your conversion speed when you need to save your files in a different video format.
Movavi Screen Recorder Features
#1. Screen Recording
1.1. Capture Area
Movavi allows you to easily select the area you want to record. If you need to record the entire screen, it is possible to do that, but you can also select a portion of the screen or a particular program window. You can manually select any part of your screen for recording.
1.2. Frame rate
The software allows you to record videos with a frame rate ranging between 5 and 60 frames per second. The higher the frame rate, the higher the quality of the video, which also translates to bulky videos. It is important to adjust the frame rate to the capacity of your machine especially if you don’t have enough high storage space.
1.3. Audio Quality
It is up to you to select a suitable audio recording mode and frequency for your recordings. By choosing to record system and microphone audio simultaneously, you can seize isolated sound streams.
1.4. Webcam
If you wish to record a webcam video as part of your screen recording you can. Just go ahead and choose the frame rate, resolution, position, and size, and start recording.
1.5. Effects
Incorporating cursor movements into your video should help promote its usefulness. You can choose to highlight the cursor and assign a color for the right mouse click and another for the left. You can also display keystrokes if that’s something you desire. If you don’t want to show all the keystrokes, you can simply settle for the hotkeys.
1.6. Scheduler
This feature is a lifesaver especially if you are not available to personally oversee the recording. All you need to do is set your timer and the program will automatically initiate the recording at the set time.
Set the duration of the event or program, and once the time has elapsed the recorder will stop automatically and your PC will either go to sleep mode or shut down, depending on what you have programmed it to do.
1.7. Acceleration
If you want a fast and smooth video processing process, hardware acceleration is the way to go. Check your video card and then enable a compatible acceleration type. You can choose from AMD, Intel HD Graphics, or NVIDIA NVENC.
Regardless of the hardware choice you make, you will get superspeed mode as it is accessible on all types of hardware. With the acceleration feature, you can convert your videos much faster when handling output videos that you need to convert to different formats.
#2. Screenshotting
The screenshotting feature allows you to take screenshots while recording your videos. It also has a different screenshotting mode where you can edit images before saving them. While editing you can input text, lines, shapes, arrows, color, basically anything. You can even highlight different parts of the pictures.
#3. Exporting and Sharing Content Socially
Once you’ve completed the recording and editing phases, you have to save and then export your video. You have a variety of saving options including MOV, AVI, MP4, or even MKV. If you want a GIF, you can do that as well. If you’d like to save an audio file, simply extract it and save it as MP3.
Any screenshots you have can be saved as JPG, BMP, or PNG. Once you are done saving, your videos are ready for sharing. Upload them directly on any social media platform including Instagram, YouTube, Facebook, and Google Drive. You can share your images on WhatsApp and Telegram.
Pros
- It is a convenient screen recording software for personal and commercial purposes
- The software combines both capture and editing tools
- It is comparatively cheaper than its competitors
- It allows multiple export options
- Movavi Screen Recorder is always at your disposal. Use it to record any activity on your screen, edit the content, and then save it in any mode or format you desire.
- It is extremely easy to set up and similarly easy to use. It has an intuitive user interface
- You can record the system and microphone audio separately to eliminate stressful editing
- Movavi Screen Recorder offers consistency and reliability to customers. You will sometimes realize that the picture or video quality is much better (clearer and with high definition) compared to the live event.
- Movavi Screen Recorder is a great tool, and highly effective. It has made screen recording extremely easy, and it generates top-quality videos.
- It has made a great impact on the online content-sharing society. One can easily record live webinar sessions and later post them on YouTube and/or even offline for various teams. You can also record Skype calls, stream videos, games and applications, and anything on your screen.
- It supports 48 kHz Stereo audio quality, a quality that is ideal for vocal processing. The software has quite many colors for cursor detection while screen recording
- Movavi has incorporated such advanced tools as slow motion, video stabilization, and chroma key to produce a green screen effect
- The editing feature offers numerous interactive tools including transitions, captions, titles, filters, and even effects.
- The software offers users the flexibility to customize recordings by choosing whether to record full screens, a portion of the screen, or a particular application, window, or screen
Cons
- Limited to recording a single screen at a time
- The software is only available for PC, you cannot access it with your phone
- Poor customer support is not as reliable or valuable
- If you need to update, you have to pay some extra money
- You need to upgrade your PC to avoid the software from lagging
- It’s quite challenging to export videos, especially for first-time users
- You cannot automatically access previous recordings directly from the program
- If you need advanced editing tools, you will have to integrate extra video-recording software
Movavi Screen Recorder Pricing
Movavi offers quite a bit of flexibility when it comes to its prices. There is a free trial option that comes with some limitations, but it can be a good option for you if you are yet to make up your mind about investing in the platform.
The free plan limits users from recording and editing screenshots. Any recorded videos will also have a watermark, but if you don’t mind these limitations then you can freely use the free plan indefinitely. It does not have the constraint of time.
A personal lifetime license goes for $39.95. With this license, you have access to all Movavi features. It awards you access to the same features as a business license would. The only difference between the two is that a business license allows commercial use, while a personal one doesn’t. To get access to Movavi’s business license, you would have to pay an annual subscription fee of $69.95.
If you only need access to a Screen Recorder and a video editor, you can access a full package for an annual subscription fee of $64.95.
Pricing Limitations
You have two options: a personal license or a business one. You should make a decision based on your needs. Although both licenses work the same, with the personal license, you are not supposed to use it for any commercial purposes. However, if you choose a business license, you can freely use Movavi Screen Recorder even in a business environment.
With $39.95 you can purchase a lifetime license for your personal use, which allows you to use Movavi Screen Recorder indefinitely for non-commercial purposes. A personal license allows you to:
- Record online videos
- Capture sound and webcam video
- Take screenshots and edit them
For $69.95 you can subscribe for an annual business license, which offers you the same functions as a personal license, but in this case, you’d be able to use Movavi within your company. You can also get discount offers if you buy 5+ business licenses.
If you are not sure about the platform, they offer a trial version. However, it has some limitations; you wouldn’t be able to use sound recording features or edit your screenshots. All your videos would also have a watermark. However, by purchasing a license, you can easily eliminate these limitations.
Technical Specifications
- Operating System: Compatible with Windows 7, 8, and 10; Mac OS X 10.10 and newer/ higher version
- RAM: 2GB
- Installation Size: For Windows 42.8 MBs and 89.6 MBs for Mac
- Processor: 64-bit Intel Processor, AMD, 1 GHz
- Hard Drive Space: You get 2 GB for operations that are in progress; you can readily install a 280 MB hard disk
- Display: 1024 x 768 resolution; 32-bit color
- System Permissions: To install, you must have acquired administrator permissions
How to use Movavi Screen Recorder?
Step 1: Download and Launch the Program on Your Desktop
Go to the officialMovavi website, download the program, and install it on your computer. You can use it on Windows as well as on Mac.
Once installed, it is time to launch the program. Remember that you would have to purchase the software before you can unlock all the features. Otherwise, you would have to pick the free trial plan, which has limited functionality.
Step 2: Start Recording Video
Upon launching the program, you will automatically see and access the main interface that allows you to record your screen. On the panel choose the video icon and click on it. It should redirect you to the video recording function.
Once you enter video recording mode your cursor will automatically be displayed as “+”. Use it to select and customize the part of the screen you want to video record. If you want to record the entire screen, use the space button on your keyboard.
The sidebar helps you select between internal and external audio as well as the webcam feature. The icon turns green to signify that they are on. On your right, there’s a function that allows you to show or hide your cursor and mouse clicks throughout the recording.
Once you are done setting everything up, it is time to click on the red and white record button (labeled “REC”) to start recording.
Step 3: Initiate Video Recording and Include Drawings
Once the recording has started, you are still capable of adjusting your webcam and sound. In case there are important points you need to highlight, you can use the colored pencil on the panel to draw some boxes or circle the parts you want to emphasize.
Use the Camera icon to take screenshots. These are the best and most effective for when you want to capture a moment. You can also add text, arrows, and even images to your screenshots before saving them.
Once you have finished recording, press F10 on your keyboard to end the recording. You can also tap on the Square icon on your panel; it will end the video recording as well.
Step 4: Preview the Video Recording, Edit it, and then Share it
The video should automatically open in a different window. In this window, you can freely preview your recording and choose to cut it as per your preference. Once you are done editing, save it in a supported format of your liking before sharing it on various platforms or locally exporting it.
Click Export to choose the output format of the video as well as the destination.
Conclusion
Whether you need a home or office video recorder, Movavi Screen Recorder helps you with both, and at a very reasonable rate. It allows you to record live videos and audio from webinars, conference calls, or even program activities.
The platform is especially popular because it gives you the ability to take screenshots more easily, and share them online through various messaging platforms. Movavi is also great for creating your screencasts where you can also incorporate webcam footage and/or a voice-over.
However, you cannot effectively accomplish advanced video editing with this program. It is designed to execute cutting and trimming exercises, but if you need more you will have to get another program.
You will enjoy using Movavi’s screen recorder bundle, which has a powerful editor to allow you to bring your clips together.
Generally, Movavi Screen Recorder is a great tool, one that is worth checking out. It is user-friendly, and above all appropriate for all users irrespective of their skill.
FAQs
Q. Who is Movavi best suitable for?
Ans. Movavi Screen Recorder is suitable for a wide range of users, including:
- Students practicing at-home learning,
- Teachers who need to record online classes.
- Bloggers who need to develop program tutorials
- Anyone in need of creating a presentation (business people especially)
- Home users who need video recordings of webinars, or any videos they find online.
Q. How Long are Movavi Recordings on Your Screen?
Ans. Movavi can capture up to 4-hour long videos at a time.
Q. Is it possible to use Movavi across different PCs?
Ans. When you purchase a Movavi plan, you get an activation key, which can only be used on one computer at a time. However, you can get a license that allows you to use Your Movavi across different PCs. Otherwise, you would have to uninstall Movavi on the current PC and install it in the one you want to use, but that would require that both computers use the same OS.
Q. How do Movavi licenses work?
Ans. Movavi licenses its products based on the computer used as opposed to the site, user, or company applying for it. As such, you cannot sync Movavi to all your computers. This means that if you need to use the app on a different PC, you would have to uninstall it from the current one before being able to install it on another.
Q. How safe is it to use Movavi Screen Recorder?
Ans. Movavi is a very safe-to-use software. It will never harm your device as it is free of any malware. You can be sure that your privacy will remain unaffected too. To be sure, you can use an anti-virus checker to confirm.
Q. How user-friendly is Movavi Screen Recorder?
Ans. Movavi is super easy to use. It packs immense video editing power into a modest, very user-friendly interface. The software allows you access to motion tracking and chroma-key. Basic framing, PiP, and tilting. All these features are great, but they are particularly essential in improving the platform’s usability.
Q. Is Movavi Slow?
Ans. If you realize that your Movavi is slow, check the quality of the video you are recording. In most cases, the issue could be that you are recording a very high-quality video compared to the capacity of your internet speed and/or hardware. You can easily solve this issue by selecting a resolution that’s lower than the one you are currently using. Updating your video drivers could also prove useful in improving the overall speed of the application.